
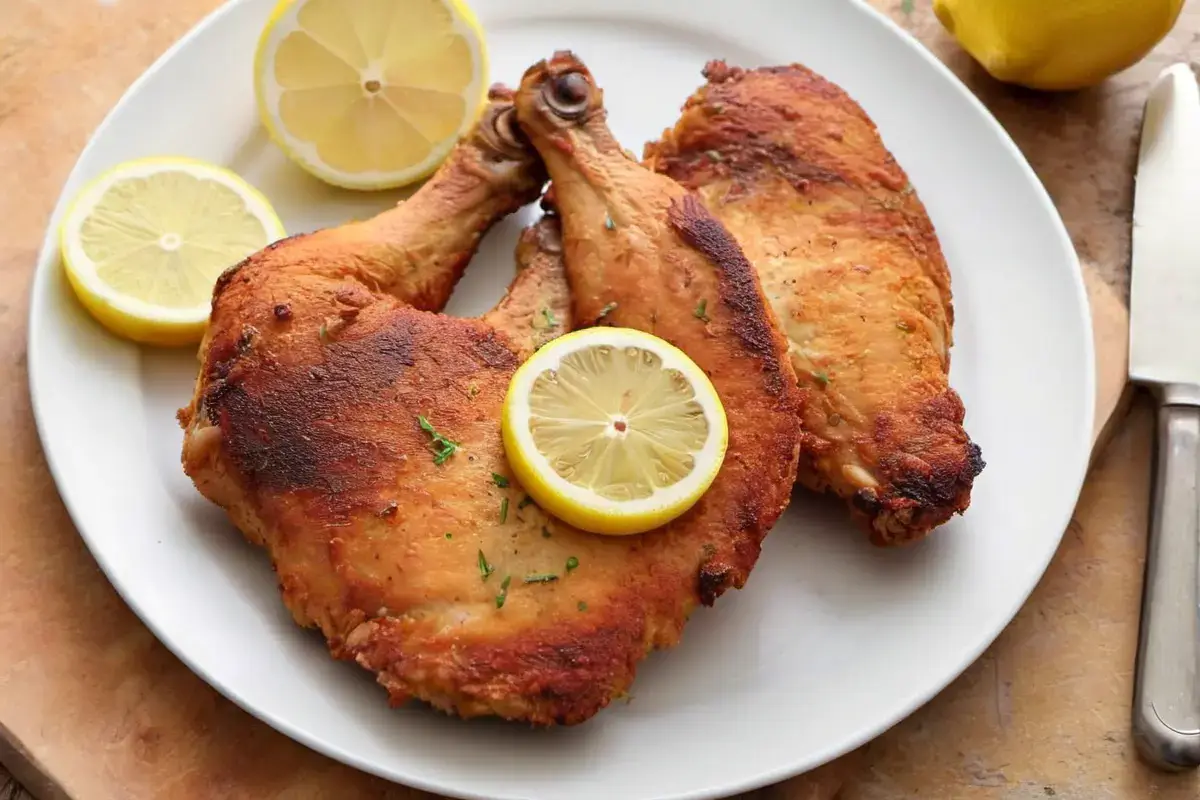
Chicken cutlets are a versatile and delicious dish enjoyed by many. Whether you prefer them fried, baked, or air-fried, these crispy delights are perfect for any meal. This article will walk you through the entire process of making chicken cutlets, from selecting the right ingredients to mastering the breading technique. You’ll also learn various cooking methods, serving suggestions, and tips for storing leftovers. Let’s dive in!
Introduction to Chicken Cutlets
Chicken cutlets are thin slices of chicken breast, breaded and cooked to perfection. They’re incredibly versatile, making them a favorite in many households. But how do you make chicken cutlets that are crispy on the outside and juicy on the inside? This guide will show you every step, ensuring you can create the perfect chicken cutlets every time.
Choosing the Right Chicken
When making chicken cutlets, start with the right chicken. Boneless, skinless chicken breasts are ideal. They cook evenly and have a mild flavor that pairs well with various seasonings. Choose fresh chicken breasts for the best results. For more insights on avoiding tough and rubbery chicken, you can check out this guide on preventing rubbery chicken cutlets which offers valuable tips on selecting and preparing your chicken properly.
Essential Ingredients
You’ll need a few basic ingredients for your chicken cutlets. These include:
- Chicken breasts: Boneless and skinless
- Flour: For the first coating
- Eggs: Beaten for the second coating
- Breadcrumbs: For the final, crispy layer
- Seasonings The most common are salt, pepper, and any other spices or herbs you would like
Optional ingredients like Parmesan cheese and Italian herbs can add extra flavor.
Tools Needed
The right tools can help. Here’s what you’ll need:
- Knife: For slicing the chicken breasts
- Meat tenderizer: For pounding the chicken to an even thickness
- Shallow bowls: For the flour, eggs, and breadcrumbs
- Baking sheet and wire rack: If you’re baking the cutlets
By preparing your ingredients and tools ahead of time, you’ll streamline the cooking process and ensure your chicken cutlets turn out perfect.
In the next part, we’ll dive into the details of preparing the chicken for breading. Stay tuned to learn the best techniques for slicing and tenderizing your chicken breasts.
Preparing the Chicken
Preparation is key to making delicious chicken cutlets. In this section, we’ll cover the essential steps for preparing your chicken breasts, ensuring they are perfectly sliced and tenderized.
Slicing the Chicken Breasts
Start by slicing the chicken breasts into thin, even pieces. This step is crucial for even cooking. Here’s how you do it:
- Trim the Chicken: Remove any excess fat or gristle from the chicken breasts.
- Slice Horizontally: Hold the chicken breast flat with one hand. Using a sharp knife, slice it horizontally into two thin pieces. This creates two cutlets from each breast.
- Even Thickness: Ensure each cutlet is of uniform thickness. This helps them cook evenly.
For easier slicing, you can partially freeze the chicken breasts for about 15 minutes. This firms them up, making it easier to cut through.
Tenderizing the Chicken
Once you’ve sliced the chicken breasts, it’s time to tenderize them. Tenderizing ensures that the cutlets cook quickly and remain juicy. Here’s the process:
- Cover the Chicken: Place a piece of plastic wrap over the chicken cutlets. This prevents bits of chicken from splattering as you tenderize them.
- Pound Evenly: Use a meat tenderizer or a rolling pin to pound the chicken cutlets gently. Start in the middle and move towards the side. Aim for an even thickness of about 1/4 inch.
Tenderizing breaks down the muscle fibers, resulting in more tender chicken cutlets.
In the next part, we’ll set up the breading station and discuss the essential techniques for breading your chicken cutlets. This step is crucial for achieving that perfect, crispy exterior.
The Breading Process
Now that your chicken cutlets are prepped, it’s time to coat them in a delicious, crispy breading. This part is crucial for achieving that perfect crunch.
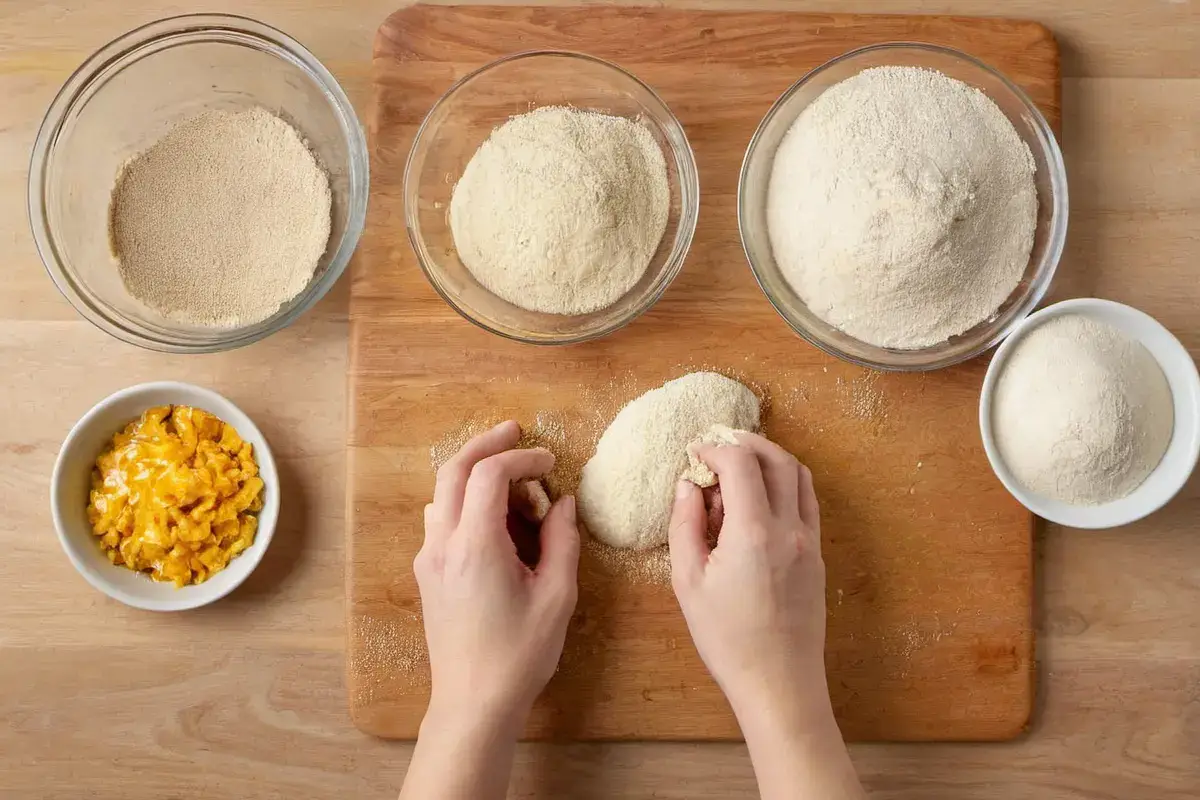
Setting Up a Breading Station
A well-organized breading station makes the process smooth and efficient. Here’s how to set it up:
- Three Shallow Bowls: Arrange three shallow bowls in a row. Fill the first with flour, the second with beaten eggs, and the third with breadcrumbs.
- Season Each Layer: Add salt and pepper to the flour and breadcrumbs. You can also mix in Parmesan cheese and Italian herbs for extra flavor.
Having everything in place before you start breading helps keep the process clean and quick. If you’re curious about the best oils to use for frying, visit this detailed comparison of oils to find out which oil suits your needs best.
Breading Techniques
Follow these steps to coat your chicken cutlets perfectly:
- Dredge in Flour: Coat each chicken cutlet lightly in flour. Shake off the excess. The flour aids in helping the egg stick with the bird.
- Dip in Egg: Next, dip the floured cutlet into the beaten eggs. Ensure it’s completely covered, then let the excess drip off.
- Coat in Breadcrumbs: Finally, press the chicken cutlet into the breadcrumbs. Ensure it’s thoroughly coated by pressing the breadcrumbs into the chicken.
To avoid messy hands, use one hand for dry ingredients (flour and breadcrumbs) and the other for wet ingredients (egg).
Tips for Perfect Breading
- Dry Chicken: Pat the chicken dry with a paper towel before starting. This helps the flour stick better.
- Press Firmly: Press the breadcrumbs firmly onto the chicken to ensure they adhere well.
- Use Fresh Breadcrumbs: For extra crunch, use fresh breadcrumbs or panko.
These techniques ensure your chicken cutlets have a delicious, crispy coating that stays on during cooking.
In the next part, we’ll explore various cooking methods for your breaded chicken cutlets. Whether you prefer frying, baking, or air-frying, we’ve got you covered.
Cooking Methods for Chicken Cutlets
Now that your chicken cutlets are perfectly breaded, it’s time to cook them. There are several methods to achieve delicious results, whether you prefer frying, baking, or air-frying. Each method has its own benefits and can be adapted to your taste and dietary preferences.
Pan-Frying Chicken Cutlets
Pan-frying is a popular method that delivers crispy, golden-brown chicken cutlets. Here’s how to do it:
- Heat the Oil: Add enough oil to cover the bottom of a large skillet. Heat over medium-high until shimmering.
- Cook the Cutlets: Add the chicken cutlets in a single layer. Fry for 3-4 minutes per side, until golden brown and cooked through. Use a meat thermometer to ensure the internal temperature reaches 165°F. For guidance on selecting the best oil, read this guide on oils for chicken cutlets. or this Mayo Clinic guide on choosing healthier oils.
- Drain and Serve: Transfer the cutlets to a paper towel-lined plate to drain excess oil. Serve immediately.
Pan-frying gives the chicken cutlets a deliciously crispy exterior while keeping the inside tender and juicy.
Baking Chicken Cutlets
Baking is a healthier alternative to frying, as it uses less oil. Here’s the best way to bake your chicken cutlets:
- Pre-heat the Oven You can set your oven at the temperature of 400degF (200degC).
- Ready baking sheet Line a baking pan with parchment or foil to make cleanup easy. Put a wire rack over the top of it to allow air circulation.
- Bake the Cutlets: Arrange the breaded chicken cutlets on the wire rack. Lightly spray them with cooking spray. Bake for 15 to 20 minutes, turning halfway until golden and crispy.
Using a wire rack ensures the chicken cutlets stay crispy on both sides.
Air-Frying Chicken Cutlets
Air-frying is another healthy method that yields crispy results with minimal oil. Here’s how to use your air fryer:
- Pre-heat the Air Fryer Then, set your air fryer at 350degF (190degC).
- Arrange the Cutlets: Place the breaded cutlets in a single layer in the air fryer basket. Lightly spray with cooking spray.
- Cook the Cutlets: Air fry for 10-12 minutes, flipping halfway through, until the cutlets are golden and reach an internal temperature of 165°F.
Air-frying is quick, convenient, and results in perfectly crispy chicken cutlets with less oil.
By choosing the method that suits your preferences, you can enjoy delicious chicken cutlets that are crispy on the outside and juicy on the inside.
In the next part, we’ll explore various serving suggestions and ideas for pairing your chicken cutlets with tasty sides and sauces.
Serving Suggestions for Chicken Cutlets
Now that your chicken cutlets are cooked to perfection, it’s time to think about how to serve them. Chicken cutlets are incredibly versatile and pair well with a variety of sides and sauces. Here are some creative serving suggestions to elevate your meal.
Classic Pairings
For a traditional approach, serve your chicken cutlets with these classic sides:
- Mashed Potatoes: Creamy and comforting, mashed potatoes are a perfect match for crispy chicken cutlets.
- Green Beans: Steamed or sautéed, green beans add a fresh, crisp contrast to the rich cutlets.
- Pasta: A simple pasta with marinara sauce or butter and garlic complements the flavors of the chicken cutlets.
These classic sides enhance the flavor of your chicken cutlets without overpowering them.
Creative Serving Ideas
If you want to get a bit more creative, try these serving ideas:
- Chicken Cutlet Sandwich: Place a chicken cutlet in a toasted bun with lettuce, tomato, and a smear of mayo or aioli for a delicious sandwich.
- Chicken Parmesan: Top your cutlets with marinara sauce and mozzarella cheese. Broil until the cheese is melted and bubbly. Serve with a side of spaghetti.
- Salad Topping: Slice the chicken cutlets and add them to a fresh salad. This adds protein and a crunchy texture to your greens.
These creative options allow you to enjoy your chicken cutlets in various ways, keeping your meals exciting and flavorful.
Sauces and Dips
Enhance your chicken cutlets with a variety of sauces and dips. Here are some favorites:
- Romesco Sauce: A smoky, nutty sauce that pairs wonderfully with the crispy texture of the cutlets.
- Tahini Sauce: Adds a rich, nutty flavor that’s perfect for dipping.
- Balsamic Glaze: Drizzle this sweet and tangy glaze over your cutlets for an extra burst of flavor.
These sauces and dips bring out the best in your chicken cutlets, making each bite more enjoyable.
By pairing your chicken cutlets with delicious sides and sauces, you can create a meal that’s both satisfying and memorable.
In the next part, we’ll discuss how to store and reheat your chicken cutlets to maintain their crispiness and flavor.
Storing and Reheating Chicken Cutlets
Storing Leftover Chicken Cutlets
When you have leftover chicken cutlets, follow these steps to store them properly:
- Cool Completely: Allow the chicken cutlets to cool completely before storing. This prevents condensation from making them soggy.
- Use Airtight Containers: Place the cooled cutlets in an airtight container. This helps keep them fresh and prevents moisture from getting in.
- Refrigerate or Freeze: Store the container in the refrigerator for up to four days. For longer storage, freeze the cutlets for up to three months.
Tips for Freezing Chicken Cutlets
Freezing chicken cutlets can be a great way to preserve them for future meals. Here’s how to do it:
- Flash Freeze: Arrange the cutlets on a baking sheet lined with parchment paper. Freeze them for about an hour, until firm. This prevents them from sticking together.
- Transfer to Freezer Bags: Place the frozen cutlets in a freezer-safe bag or container. Label with the date for easy reference.
- Reheat from Frozen: You can reheat the cutlets directly from the freezer using an oven or air fryer. No need to thaw!
Reheating Techniques
Reheating chicken cutlets properly ensures they stay crispy and delicious. Avoid microwaving as it could make the breading dry. Below are the accurate ways to avoid microwaving:
- Oven Heating: Heat your oven to 400 degF (200degC). Set the cutlets onto a rack that is set on a baking sheet. Then, heat for around 10 minutes or until they are crispy and warm to the touch.
- Air Fryer Reheating: Preheat your air fryer to 375°F (190°C). Arrange the cutlets in a single layer and air fry for 5-7 minutes, flipping halfway through. You can find more detailed instructions on reheating techniques in this comprehensive cooking guide.
- Skillet Reheating: Heat a small amount of oil in a skillet over medium heat. Add the cutlets and cook for 3-4 minutes per side, until crispy and warmed through.
These methods help maintain the texture and flavor of your chicken cutlets, making them taste freshly cooked.
In the next part, we’ll share some expert tips and tricks for perfecting your chicken cutlets, along with common mistakes to avoid.
Expert Tips and Tricks for Perfect Chicken Cutlets
Creating the perfect chicken cutlets involves more than just following a recipe. With a few expert tips and tricks, you can elevate your dish to new heights. Here are some valuable insights and common mistakes to avoid to ensure your chicken cutlets turn out amazing every time.
Expert Tips for Perfect Chicken Cutlets
- Use Fresh Ingredients: Always use fresh chicken breasts and breadcrumbs. Fresh ingredients ensure better flavor and texture.
- Season Generously: Season each layer—flour, eggs, and breadcrumbs. This ensures every bite is flavorful. Adding Parmesan cheese and Italian herbs to the breadcrumbs can enhance the taste.
- aintain Consistent Thickness: Ensuring that each chicken cutlet is of uniform thickness helps them cook evenly.This keeps the thinner components from drying out while the more dense parts cook.
- Keep Oil Temperature Consistent: When pan-frying, maintain a steady oil temperature. Too hot, and the breading will burn before the chicken cooks through; too cool, and the cutlets will absorb excess oil and become greasy.
- Let Rest Before Frying: After breading, let the cutlets rest on a wire rack for about 10 minutes. This makes the breading stick better and stops it from falling off during cooking.
Common Mistakes to Avoid
- Skipping the Tenderizing Step: Not tenderizing the chicken can result in uneven cooking and tougher texture. Always pound the cutlets to an even thickness.
- Overcrowding the Pan: When frying, avoid overcrowding the pan. This lowers the oil temperature and results in soggy, unevenly cooked cutlets. Fry in batches if necessary.
- Using Cold Chicken: Let the chicken come to room temperature before cooking. Cold chicken can cause the oil temperature to drop, leading to greasy cutlets.
- Not Using a Wire Rack: Whether baking or frying, placing the cutlets on a wire rack allows air circulation, keeping them crispy all around.
- Neglecting to Pat Dry: Always pat the chicken dry with paper towels before breading. Excess moisture can cause the breading to slip off.
By following these tips and avoiding common mistakes, you can make sure your chicken cutlets are always delicious, crispy, and perfectly cooked.
In the next part, we will address some frequently asked questions (FAQs) about making chicken cutlets, providing additional insights and solutions to common issues.
Frequently Asked Questions (FAQs) about Chicken Cutlets
Chicken cutlets are a beloved dish, but many people have questions about how to make them perfectly. In this section, we’ll answer some frequently asked questions to help you master the art of making chicken cutlets.
Q: How do you keep the breading from falling off?
A: To ensure the breading sticks, start by patting the chicken dry with paper towels. Use the three-step breading process: dredge in flour, dip in beaten eggs, and coat with breadcrumbs. Let the breaded cutlets rest on a wire rack for about 10 minutes before cooking. This helps the breading adhere better. When frying, avoid overcrowding the pan, which can cause the breading to come off.
Q: Can you make chicken cutlets ahead of time?
A: Yes, you can make chicken cutlets ahead of time. Bread the cutlets and place them on a baking sheet lined with parchment paper.
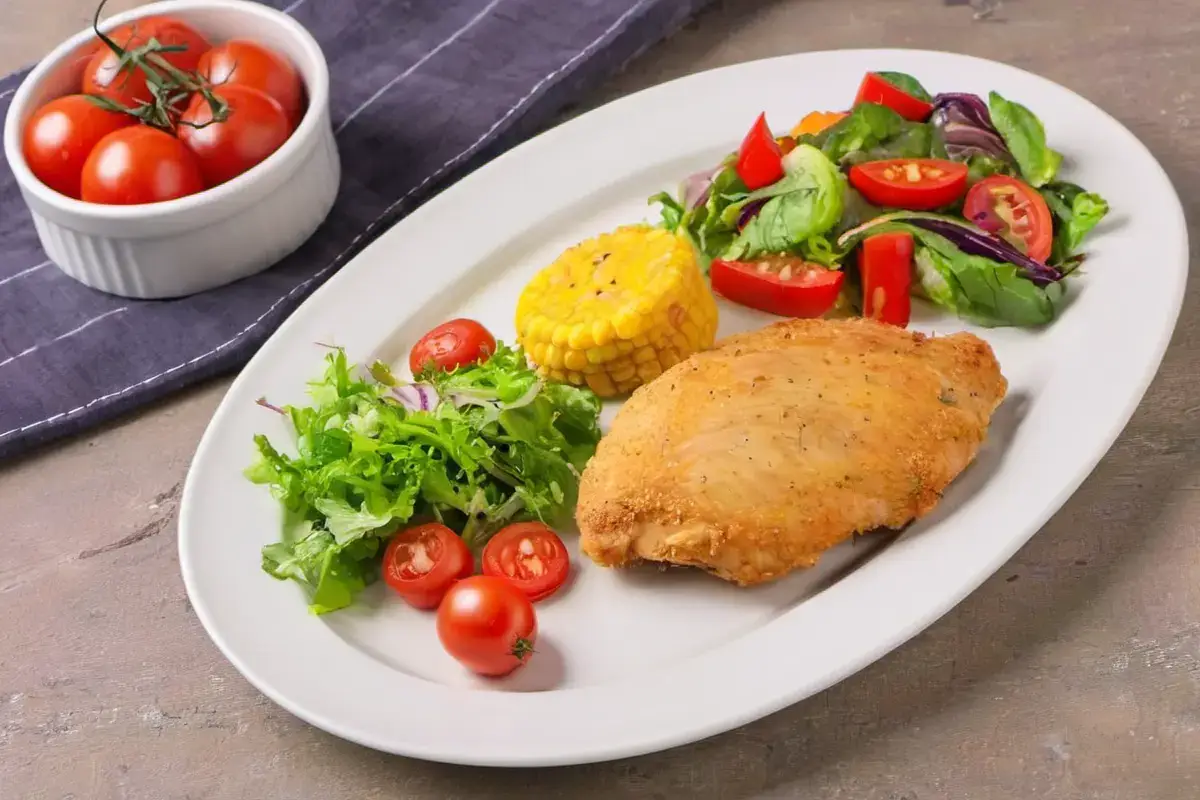
Q: Are chicken cutlets healthy?
A: Chicken cutlets can be a healthy option, especially if baked or air-fried instead of pan-fried. Using lean chicken breasts, minimal oil, and whole-grain breadcrumbs can enhance the nutritional value. Pairing with fresh vegetables or a salad makes for a balanced meal.
Q: How do you reheat chicken cutlets without making them soggy?
A: To reheat chicken cutlets while keeping them crispy, avoid the microwave. Instead, use an oven or air fryer. Preheat your oven to 400°F (200°C) and place the cutlets on a wire rack over a baking sheet. Heat for 10-15 minutes. For air frying, set the air fryer to 375°F (190°C) and cook for 5-7 minutes, flipping halfway through.
Q: Can you freeze cooked chicken cutlets?
A: Yes, cooked chicken cutlets freeze well. Once cooled, place them on a baking sheet and freeze until firm. Then transfer to a freezer-safe bag or container. They can be stored for up to three months. Reheat directly from frozen in the oven or air fryer to maintain crispiness.
By addressing these common questions, you can avoid pitfalls and ensure your chicken cutlets are always delicious and well-prepared.
In the final part, we’ll summarize key points and provide some final thoughts on making perfect chicken cutlets.