
If you’re aiming to cook a chuck roast that literally falls apart, you’re in the right place! This guide will walk you through every step needed to achieve that melt-in-your-mouth texture that makes chuck roast a favorite for many. From selecting the best cut to mastering the cooking technique, we cover all the bases. So, whether you’re a seasoned cook or trying this dish for the first time, prepare to turn your kitchen into a haven of delicious aromas and flavors.
Introduction to Cooking the Perfect Chuck Roast
Understanding the Basics of Chuck Roast
When it comes to comfort food, few dishes can compete with a well-cooked chuck roast. For more delightful dishes that can be made from chuck roast for family meals, you can explore an array of recipes here. This link provides a variety of ways to enjoy chuck roast, each tailored to make your family dinner a hit.
First off, chuck roast is a beef cut that comes from the shoulder area of the cow. Known for its rich marbling and dense connective tissues, chuck roast provides a depth of flavor and tenderness when cooked correctly. For those interested in the science behind meat cuts and cooking, educational resources such as university meat science guides can offer valuable insights.
In this first part of our guide, we’ll dive into the essentials of chuck roast, including the impact of temperature on its texture. Not only will we explore why this cut is ideal, but we’ll also start to unravel how you can cook it to perfection, ensuring that every slice is tender and succulent.
Stay tuned as we delve deeper into choosing the right cut, and remember, the secret to a perfect chuck roast lies not just in the cooking but in starting with the right basics. So, let’s get cooking!
Choosing the Best Cut for Fall-Apart Chuck Roast
Characteristics of Chuck Roast
When you set out to make a chuck roast that falls apart easily, selecting the right cut of meat is your first crucial step. Not all cuts of beef are created equal, especially when your goal is to achieve that tender, pull-apart quality that chuck roast is famed for.
The chuck roast itself hails from the shoulder region of the cow, an area known for its robust flavor due to a high degree of muscle work. This activity results in more connective tissue, collagen, and fat, which, when cooked slowly, transforms into gelatin—giving the meat its characteristic tender texture. But within the broad category of chuck roast, there are several cuts to consider:
- Shoulder Roast: Also known as the chuck shoulder pot roast, this cut is leaner but still has enough fat to become tender and juicy when cooked properly. It’s perfect for those who want slices that are both tender and hold together well.
- Chuck Eye Roast: Coming from the upper shoulder, closer to the rib, the chuck eye is slightly more marbled and tender than other parts of the chuck. It’s ideal for a fall-apart roast if cooked with care.
- Arm Chuck Roast: This part includes more bone, which can enhance flavor during the slow cooking process. It’s excellent for pot roasts where the meat needs to be exceptionally tender.
Choosing the right cut depends largely on your personal preference and the specific recipe you are following. However, for that classic fall-apart texture, a well-marbled chuck roast or a chuck eye roast is typically your best bet. These cuts not only absorb flavors well but also have the ideal fat content that renders down beautifully, ensuring every bite is as flavorful as it is tender.
Remember, the key to a perfect roast lies not just in the cooking process but in starting with a cut that suits your end goal. Now that you know what to look for in the meat aisle, let’s move on to how you should prepare your chuck roast to maximize its fall-apart potential. Stay tuned for the essential preparation steps coming up next!
Preparing Your Chuck Roast for Cooking
Necessary Ingredients and Initial Preparation
Before you can witness your chuck roast transform into a succulent, fall-apart delight, it’s essential to get your ingredients ready and tackle the initial preparation with precision. This preparation stage sets the stage for cooking success, enhancing the flavors and textures that will define your dish.
Ingredients List:
To begin, gather the following ingredients, which will complement the natural flavors of the chuck roast:
- Beef Chuck Roast (about 4 pounds for serving 4-6 people)
- Yellow Onion (1 large, quartered)
- Carrots (1 pound, cut into 2-inch pieces)
- Garlic (3 cloves, minced)
- Beef Broth (32 ounces, preferably unsalted)
- Worcestershire Sauce (2 tablespoons)
- Olive Oil (for searing)
- Salt and Pepper (to taste)
Preparation Steps:
- Trim the Fat: While chuck roast benefits from fat, trimming excess fat can prevent the dish from becoming too greasy. Leave a thin layer to ensure moisture retention during cooking.
- Season Generously: Season the roast liberally with salt and pepper on all sides. This not only enhances flavor but also aids in forming a delicious crust when seared.
- Sear the Meat: Heat olive oil in a large Dutch oven or heavy-bottomed pot over medium-high heat. Once hot, sear the roast on all sides until a golden-brown crust forms, typically about 3-4 minutes per side. Searing locks in flavors and starts the maillard reaction, essential for a deep, savory taste. To understand more about why searing is crucial and its benefits, you can read further here.
- Prepare the Vegetables: While the meat sears, prepare your vegetables. Quarter the onion, chop the carrots, and mince the garlic. These will cook alongside the meat, absorbing the juices and adding their flavors to the broth.
- Deglaze the Pan: After removing the roast, add a splash of beef broth to the pot. Make use of a wooden spoon to scrape any brown bits that have accumulated at on the inside of the pot. These bits are packed with flavor and will enrich your cooking liquid.
By meticulously preparing your ingredients and setting the stage for your roast, you’re ensuring that every element of the dish contributes to a rich, complex flavor profile. With the preparations complete, we’re ready to dive into the actual cooking process, where the chuck roast will slowly transform into the tender, fall-apart masterpiece you crave. Stay tuned for detailed cooking steps to ensure your roast turns out perfectly!
Mastering the Cooking Technique for Chuck Roast
Detailed Cooking Steps
Now that your chuck roast and accompanying ingredients are prepped and ready, it’s time to dive into the cooking process. This phase is crucial for transforming your well-prepared ingredients into a tender, flavorful, fall-apart chuck roast. Here’s how you can master the cooking technique to ensure the best results. If you are curious about other effective methods to cook chuck roast, check out the top techniques here. This guide discusses various methods and helps you choose the best one for your needs.
- Return the Meat to the Pot: After searing and deglazing, place the chuck roast back into the Dutch oven. Surround it with the prepared onions, carrots, and minced garlic, distributing them evenly around the meat.
- Add Liquids and Seasonings: Pour the remaining beef broth over the roast, ensuring that it comes up at least halfway up the sides of the meat. Drizzle the Worcestershire sauce over the top and give everything a gentle stir to mix the flavors.
- Slow Cook in the Oven: Preheat your oven to 275°F (135°C). Once preheated, cover the Dutch oven with its lid and place it in the oven. This low temperature is key to breaking down the tough fibers in the chuck roast without drying it out. The slow cooking process allows the meat to become incredibly tender and flavors to develop deeply. Understanding the nutritional benefits of slow cooking can be enhanced by reading expert articles, such as those found here.
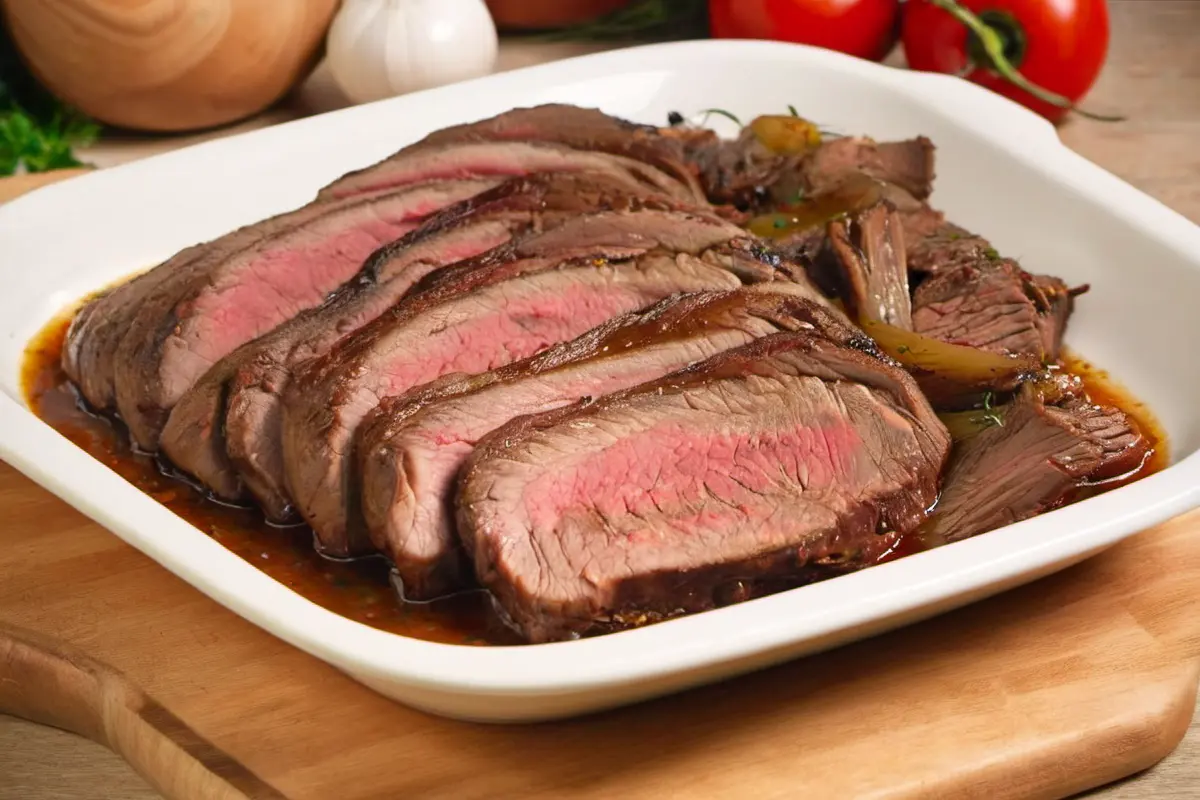
- Cooking Time: The general rule of thumb for cooking chuck roast is about an hour per pound, but this can vary based on the size and cut of your roast. Plan on cooking your roast for approximately 4 to 5 hours, but always check for doneness rather than strictly timing it. The roast is ready when it can be easily pulled apart with a fork.
- Check and Baste: Throughout the cooking process, check the roast every hour to baste it with the cooking liquids. This not only prevents the top from drying out but also enhances the flavor by continually coating the meat in its aromatic juices.
- Rest Before Serving: Once the meat is tender and falls apart easily, remove it from the oven and let it rest for about 15-20 minutes before serving. Resting allows the juices to redistribute throughout the meat, making every bite succulently moist.
By following these detailed steps, you ensure that your chuck roast cooks evenly and develops the melt-in-your-mouth texture that makes this dish a standout. Not only will the meat be tender and flavorful, but the vegetables will also have absorbed all the savory flavors from the broth and meat juices, completing the dish with their own tender textures and rich tastes.
Next, we’ll explore how to achieve the perfect temperature and timing to get your chuck roast to fall apart, enhancing your mastery of this classic comfort food. Stay tuned for more insights!
Optimal Temperature and Timing for Fall-Apart Chuck Roast
Finding the Perfect Cooking Conditions
Achieving the perfect fall-apart texture in your chuck roast isn’t just about following a recipe—it’s about understanding how temperature and cooking time influence the texture and flavor of the meat. Here, we’ll dive into the details of setting the right conditions to ensure your roast becomes tender and delicious.
To ensure clarity and ease of reference, the following table summarizes the ideal cooking conditions for your chuck roast. These guidelines will help you achieve that perfect tender texture every time you cook:
| Cooking Aspect | Detail | Tips | Checkpoint |
|---|---|---|---|
| Temperature | 275°F (135°C) | Low and slow is key to tenderness | Use an oven thermometer to ensure accurate temperature settings. |
| Time | 1 hour per pound | Approximately 4-5 hours for a 4-pound roast | Check meat every 30 minutes after the 3-hour mark. |
| Doneness | 190-195°F internal | Use a meat thermometer for precision | Roast should easily pull apart with a fork. |
Optimal Cooking Temperature:
The magic number for cooking chuck roast to perfection is 275°F (135°C). This lower temperature is crucial for cooking the meat gently and slowly, allowing the tough fibers and connective tissues to break down without losing moisture. Cooking at a low temperature ensures that the fat renders slowly, infusing the roast with flavor and maintaining a succulent texture. Detailed discussions on how cooking temperatures affect meat, particularly the breakdown of collagen, are available in comprehensive guides here.
Timing is Everything:
The length of time you cook your chuck roast is equally important. As a general guideline, you should aim for about 1 hour of cooking time per pound of meat. However, the true test of doneness is whether the meat falls apart easily when prodded with a fork. Here’s how to gauge if your roast is cooked to perfection:
- Check the Meat Regularly: After the initial few hours, begin checking the meat every 30 minutes. Pay attention to how easily it yields to a fork.
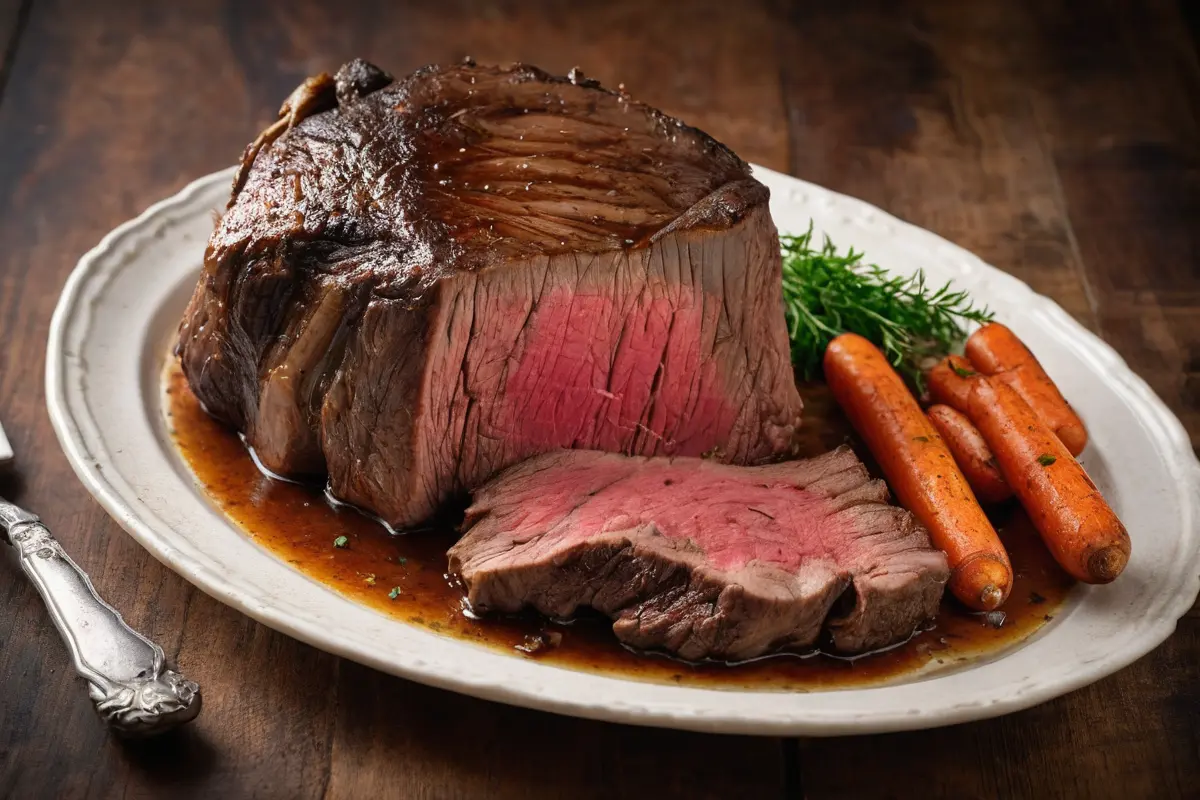
- Look for an Internal Temperature of 190-195°F: For those who like precision, using a meat thermometer can help. Chuck roast is best enjoyed when the internal temperature reaches between 190°F and 195°F. At this range, the collagen within the meat has broken down completely, transforming the roast into a tender, juicy feast.
- Adjust According to Size and Oven Variations: Keep in mind that every oven is different and the size and shape of the roast can affect cooking time. It’s wise to start checking the roast well before you expect it to be done, just in case it cooks faster than anticipated.
- Extended Cooking Time for Larger Roasts: If you’re cooking a particularly large chuck roast, it may need more than the standard time. Be flexible and adjust your cooking time based on the texture of the meat rather than the clock.
By mastering the balance of temperature and time, you can ensure your chuck roast turns out perfectly tender every time. Now that you understand the technical aspects of cooking your chuck roast, we will move on to solving common issues that might arise during the cooking process, ensuring you’re equipped to handle anything that comes your way in the kitchen. Stay tuned for troubleshooting tips next!
Solving Common Cooking Issues
Ensuring Your Roast Falls Apart
Even with the best preparation and cooking techniques, sometimes issues can arise that prevent your chuck roast from reaching that ideal fall-apart texture. Here, we’ll address some common problems and provide solutions to ensure your roast turns out perfectly every time.
Issue 1: Roast is Tough and Chewy
If your chuck roast is still tough after the recommended cooking time, it likely hasn’t cooked long enough. Despite what might seem counterintuitive:
- Solution: Continue cooking the roast, checking every 30 minutes. Remember, slow and low is the mantra for a tender chuck roast. The longer it cooks at a low temperature, the more the fibers will break down, eventually leading to that desired tenderness.
Issue 2: Roast is Dry
A dry roast often results from insufficient moisture during the cooking process or too high of a cooking temperature.
- Solution: Ensure there is always enough liquid in the pot to create steam and keep the roast moist. Lower the oven temperature if necessary and consider tenting the roast with aluminum foil to help retain moisture.
Issue 3: Flavor is Bland
Sometimes, even a well-cooked roast can lack flavor if the seasoning and basting aren’t done correctly.
- Solution: Season the roast generously before cooking, and don’t forget to baste. Every hour, spoon the cooking liquids over the roast to enrich it with flavors and enhance the overall taste.
Issue 4: Vegetables are Overcooked
Vegetables cooked with the roast might turn mushy if they’re in the oven for the full duration, especially in a slow-cooked dish.
- Solution: Add hardier vegetables like carrots and potatoes later in the cooking process, or use larger cuts to ensure they don’t break down too quickly.
Master cooking chuck roast by learning common issues, fixing them, and adapting your process for perfect results every time.
Up next, we’ll explore how to present and serve your perfectly cooked chuck roast, adding those final touches that transform a meal from good to great. Stay tuned for serving suggestions and presentation tips!
Serving and Presentation
Final Touches and Presentation Tips
After hours of slow cooking, your chuck roast is now tender and flavorsome, ready to be presented and served. Here’s how to give your dish the finishing touches that elevate it from a simple home-cooked meal to a feast worthy of a special occasion.
1. Let the Meat Rest:
- Before you slice or pull apart the roast, allow it to rest for at least 20 minutes after taking it out of the oven. This resting period lets the juices redistribute throughout the meat, ensuring that each bite is juicy and tender.
2. Slice or Shred:
- Depending on your preference, you can either slice the chuck roast against the grain for a more traditional presentation or shred it for a rustic, comforting look. Use a sharp knife for slicing to maintain the beautiful texture without it falling apart prematurely.
3. Arrange on a Platter:
- Transfer the meat to a large serving platter. Surround it with the cooked vegetables that have absorbed all the delicious cooking juices. This not only adds color and variety to the presentation but also shows off the one-pot nature of the dish.
4. Garnish and Season:
- A light garnish can enhance both the look and flavor of your chuck roast. Sprinkle over some fresh herbs like parsley or thyme for a burst of color and a fresh aroma. If needed, a final sprinkle of coarse salt can enhance the meat’s natural flavors just before serving.
5. Serve with Sides:
- Complement your chuck roast with side dishes that match its hearty nature. Creamy mashed potatoes, a vibrant green salad, or fresh bread are excellent choices that balance the richness of the meat.
6. Sauce It Up:
- Finally, consider serving your chuck roast with a side of gravy made from the cooking liquids. Simply skim off any excess fat from the liquids left in the pot, thicken with a little flour or cornstarch if desired, and heat until bubbly.
Presentation Tips:
- When plating, think about color and contrast. Use white or light-colored plates for a stark contrast that makes the deep browns and rich colors of the roast and vegetables stand out.
- Serve the roast family-style in the center of the table to encourage sharing and interaction, which adds a warm, communal feel to any meal.
With these serving tips, your chuck roast will taste amazing and dazzle at the dinner table, transforming a regular meal into a delightful culinary event for your guests.
Now that we’ve covered everything from selecting the right cut to presenting it beautifully, you’re fully equipped to create a fall-apart chuck roast that is sure to impress. Enjoy the fruits of your labor, and may your meals always be as comforting and satisfying as this classic dish.
Frequently Asked Questions About Cooking Chuck Roast
After diving deep into every aspect of preparing and cooking a fall-apart chuck roast, you might still have a few questions. This section covers some of the most common queries to help clarify any lingering doubts and provide quick, helpful insights.
Q1: At what temp does chuck roast fall apart?
- A: For the perfect fall-apart chuck roast, cooking it in an oven set at 275°F (135°C) is ideal. This low temperature allows the meat’s tough fibers and connective tissues to break down slowly, ensuring tender, moist results.
Q2: How long should I cook a 4-pound chuck roast to make it tender?
- A: Generally, a chuck roast should cook for about an hour per pound at 275°F. For a 4-pound roast, aim for about 4-5 hours of cooking time. However, always verify doneness by checking if the meat easily pulls apart with a fork.
Q3: Can I cook chuck roast faster at a higher temperature?
- A: While it’s technically possible, cooking chuck roast at a higher temperature often leads to tougher meat. The low-and-slow approach is recommended to achieve a tender, fall-apart texture.
Q4: Why is my chuck roast tough after cooking?
- A: If your chuck roast is tough, it likely hasn’t cooked long enough. Continue cooking it, checking periodically, until it reaches the desired tenderness. Remember, patience is key with this cut of meat!
Q5: Can I make chuck roast in a slow cooker or Instant Pot?
- A: Absolutely! Both slow cookers and Instant Pots are excellent for cooking chuck roast, especially if you prefer a set-it-and-forget-it method. Adjust the cooking time according to your appliance’s specifications to ensure it becomes tender.
Q6: What are the best vegetables to cook with chuck roast?
- A: Root vegetables like carrots, potatoes, and onions pair well with chuck roast as they can withstand long cooking times and absorb the meat’s flavors. Add them to the pot to create a hearty, flavorful one-pot meal.
Q7: How can I enhance the flavor of my chuck roast?
- A: To enhance the flavor, make sure to sear the meat before slow cooking to develop a rich crust. Use a good quality beef broth, fresh herbs, and season appropriately. Don’t forget to baste the roast periodically with its cooking juices.
Q8: What should I do with leftover chuck roast?
- A: Leftover chuck roast can be shredded and used in sandwiches, tacos, or even as a protein addition to salads. It’s also delicious reheated with some of its cooking liquid to keep it moist.