Creating a perfect crème brûlée involves mastering the art of caramelizing sugar. Traditionally, a blowtorch is used for this purpose. However, not everyone has a blowtorch handy. Fear not! This article will guide you through various methods to caramelize sugar for crème brûlée without a blowtorch. We’ll explore different techniques, offer detailed instructions, and share useful tips to ensure your dessert turns out spectacularly. So, let’s dive in and transform your crème brûlée experience!
Introduction
Crème brûlée stands as a classic dessert that dazzles with its creamy texture and crunchy caramelized sugar topping. The process of caramelizing sugar can seem daunting, especially without a blowtorch. But don’t worry. We’ve got alternative methods that work just as well. You’ll learn how to achieve that perfect, golden crust using tools and techniques available in most kitchens. Caramelizing sugar for crème brûlée without a blowtorch is not only possible but also fun and rewarding.
What is Caramelization?
Caramelization is the process of heating sugar until it liquefies and turns a rich golden brown. This transformation happens when the sugar molecules break down under heat, creating complex flavors and colors. It’s a crucial step in making crème brûlée, adding that signature crunchy layer.
The Science Behind Caramelization
Understanding the science behind caramelization helps you master the technique. When sugar is heated, it melts and then undergoes a series of chemical reactions, breaking down into simpler compounds that create a deep, rich flavor. The process begins around 320°F (160°C) and can go up to 400°F (204°C). This range is where the magic happens, turning simple sugar into a deliciously complex topping. For a deeper dive into the science of caramelization, visit Exploratorium’s Science of Cooking: Caramelization.
Traditional Methods
Traditionally, a blowtorch caramelizes the sugar on crème brûlée. This method provides precise control, allowing for an evenly distributed caramel layer. However, alternative methods exist for those without a blowtorch, and they can be just as effective. Let’s explore these next.
Alternative Methods to Caramelize Sugar
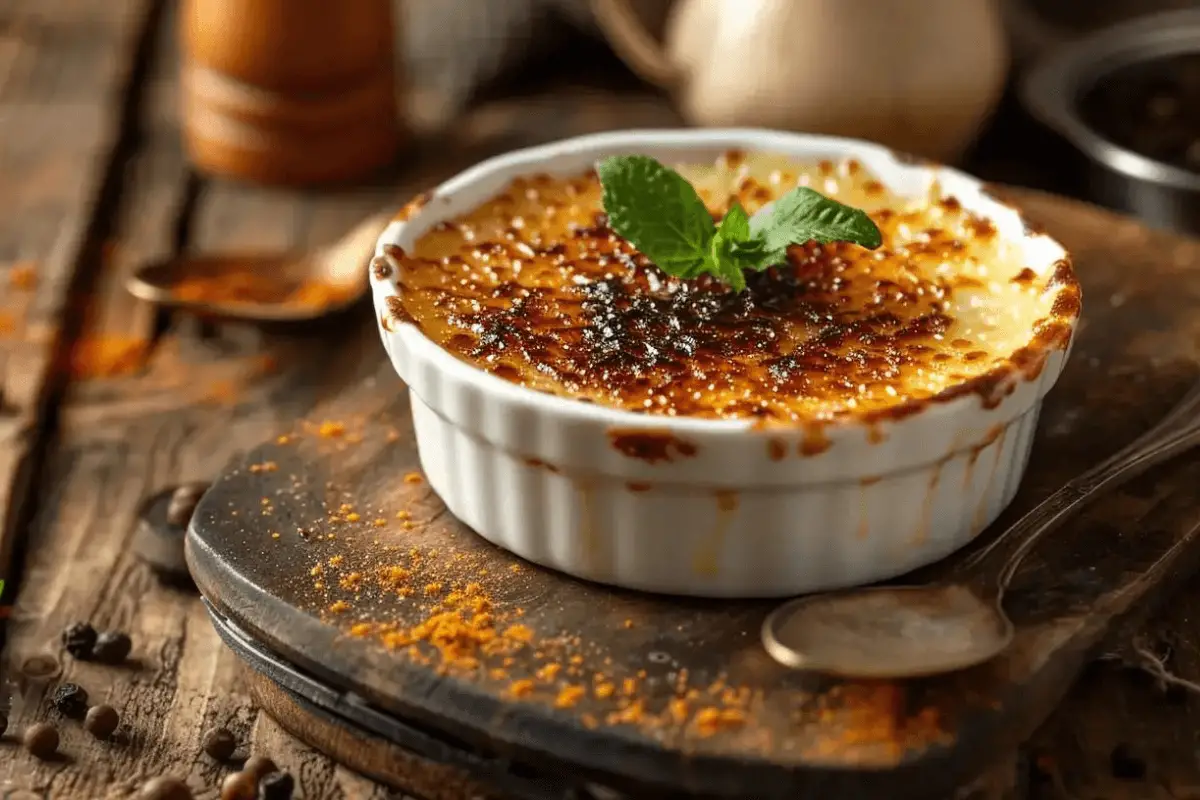
Method 1: Oven Broiler
The oven broiler is a fantastic alternative to a blowtorch. It’s readily available in most kitchens and can create that perfect caramelized crust. To start, preheat your broiler. Sprinkle an even layer of sugar over the crème brûlée. Place the ramekins under the broiler. Watch closely to prevent burning. Within minutes, you’ll have a beautifully caramelized top. For best results, use the middle rack to avoid direct heat, ensuring a more controlled caramelization process.
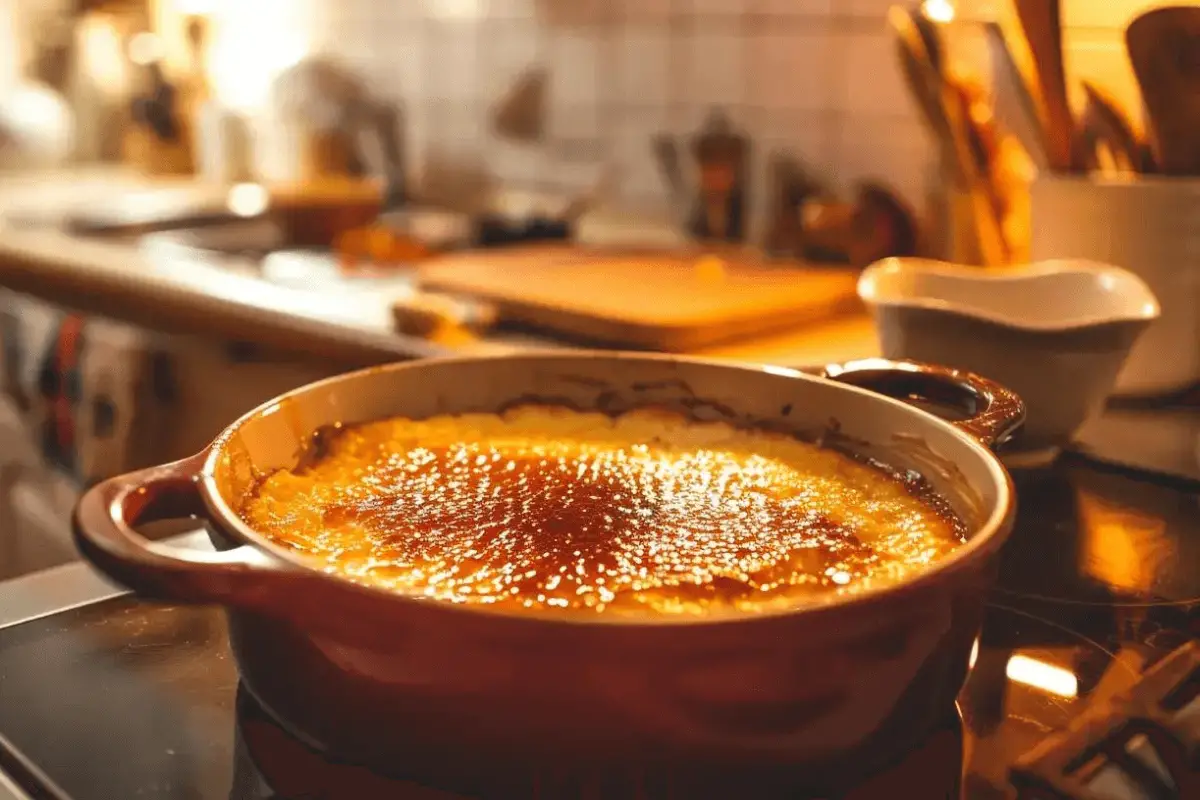
Method 2: Stovetop Caramelization
Stovetop caramelization offers another effective method. Begin by placing a small saucepan over medium heat. Add a thin layer of sugar. Let it melt and turn golden brown. Once caramelized, quickly pour the liquid sugar over the crème brûlée. Spread it evenly before it hardens. This method requires quick action, but it results in a smooth, glassy crust. It’s perfect for those who enjoy a hands-on approach to dessert-making.
Method 3: Using a Spoon
Using a heated spoon may sound unconventional, but it works wonders. Heat a metal spoon over a flame until it’s very hot. Carefully press the hot spoon onto the sugar-coated surface of the crème brûlée. The heat from the spoon will melt the sugar, creating a caramelized layer. Repeat the process to cover the entire surface. This method offers precision, allowing you to caramelize specific areas without affecting the rest of the dessert. It’s a great trick for achieving that perfect finish.
In the next part, we’ll dive deeper into detailed instructions for each method, providing step-by-step guidance to ensure your success. Get ready to master the art of caramelizing sugar for crème brûlée without a blowtorch!
Detailed Instructions for Each Method
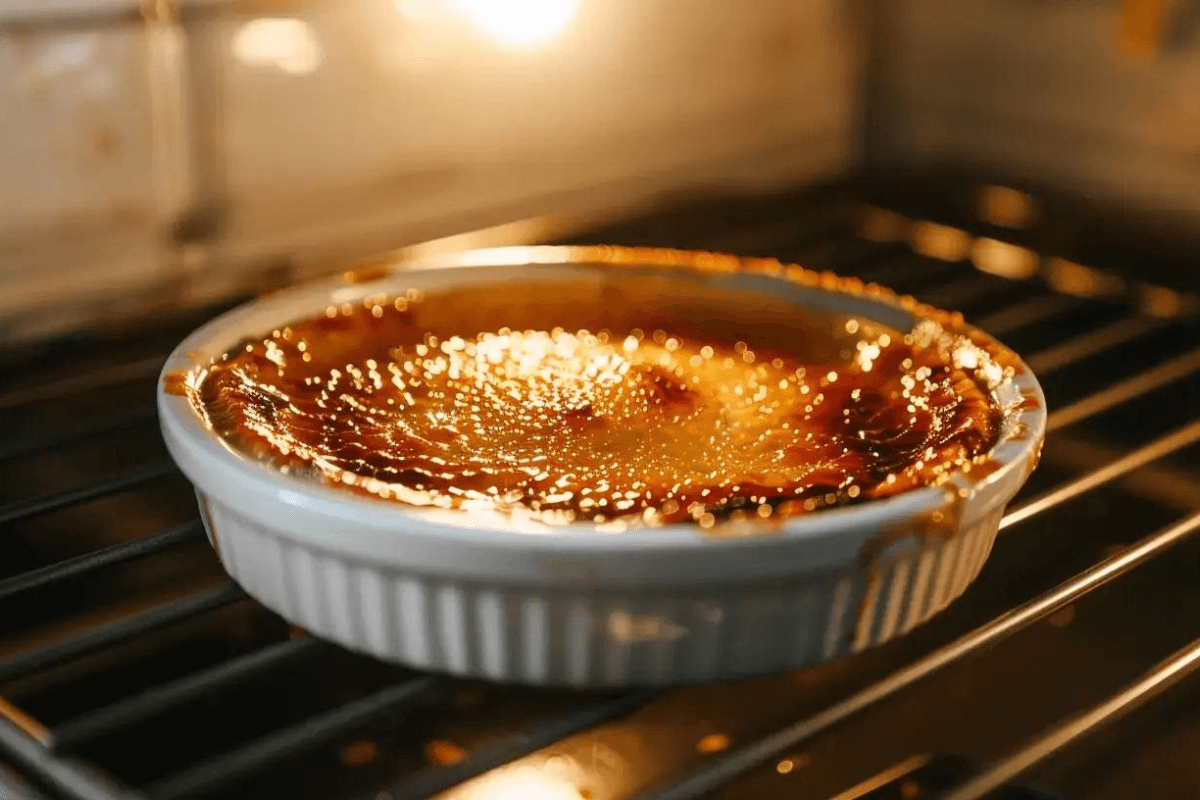
Step-by-Step Guide for Oven Broiler
Using an oven broiler to caramelize sugar is straightforward and effective. Follow these steps for perfect results:
- Preheat Your Broiler
Set your oven to the broiler setting and allow it to preheat. This ensures the sugar caramelizes quickly and evenly. - Prepare the Crème Brûlée
Sprinkle a thin, even layer of granulated sugar over the chilled crème brûlée. Make sure to cover the entire surface for a uniform crust. - Broiling Process
Place the ramekins on a baking sheet. Position the sheet on the middle rack to avoid direct heat exposure. Monitor the sugar closely as it begins to melt and turn golden brown. This usually takes 2-5 minutes, depending on the broiler’s intensity. For tips on broiling and baking, explore How to Reheat Pineapple Upside-Down Cake. - Finishing Touches
Once the sugar has caramelized to a golden brown, remove the ramekins from the oven. Let them cool for a few minutes before serving to allow the sugar to harden into a crisp, crackling crust.
Step-by-Step Guide for Stovetop Caramelization
Stovetop caramelization is another fantastic method for achieving a glassy, caramelized sugar crust:
- Gather Your Ingredients
You’ll need granulated sugar and a small, heavy-bottomed saucepan. - Melting the Sugar
Place the saucepan over medium heat. Add a thin layer of sugar, spreading it evenly across the bottom. Allow the sugar to melt without stirring. As it melts, it will turn from white to a golden amber color. - Pouring the Caramel
Once the sugar reaches the desired color, immediately remove the saucepan from the heat. Carefully pour the caramelized sugar over the chilled crème brûlée, tilting the ramekin to spread the caramel evenly. - Cooling Down
Let the caramelized crème brûlée sit for a few minutes. This cooling period allows the caramel to harden, forming a crisp top layer.
Step-by-Step Guide for Using a Spoon
This method involves using a heated spoon to caramelize the sugar directly on the crème brûlée:
- Prepare Your Spoon
Use a sturdy metal spoon and heat it over an open flame, such as a gas stove or a barbecue lighter. Ensure the spoon is extremely hot before proceeding. - Sugar Preparation
Evenly sprinkle a layer of granulated sugar over the surface of the chilled crème brûlée. Make sure the sugar layer is thin but covers the entire surface. - Caramelizing the Sugar
Carefully press the hot spoon onto the sugar-covered crème brûlée. The intense heat will melt the sugar, creating a caramelized patch. Lift the spoon and repeat this process until the entire surface is caramelized. - Final Touches
Allow the caramelized crème brûlée to cool slightly. The sugar will harden quickly, forming the characteristic crunchy top.
Tips for Perfect Caramelization
Achieving the perfect caramelized sugar crust requires some finesse. Here are some tips to help you:
- Even Sugar Layer: Ensure the sugar layer is even and not too thick. This promotes uniform caramelization.
- Monitor Closely: When using the broiler or stovetop, watch the sugar closely. It can burn quickly once it starts to caramelize.
- Cool Down: Let the caramelized crème brûlée cool for a few minutes before serving. This allows the sugar to harden properly.
Common Mistakes to Avoid
Avoid these common pitfalls to ensure your caramelization process goes smoothly:
- Thick Sugar Layer: A thick layer of sugar can lead to uneven caramelization. Stick to a thin, even layer.
- Insufficient Heating: Make sure your heat source is hot enough to caramelize the sugar. A lukewarm broiler or spoon will not do the job.
- Burning the Sugar: Sugar can go from caramelized to burnt in seconds. Keep a close eye on the sugar, especially when using high heat.
- Uneven Sugar Distribution: Clumps or uneven patches of sugar can lead to spotty caramelization. Spread the sugar as evenly as possible. For further insights on avoiding cooking mistakes, see Why Did My Pound Cake Turn Brown Inside?.
In the next part, we will explore additional tips and tricks for perfect caramelization, ensuring your crème brûlée turns out just right every time. Stay tuned for more insights!
Additional Tips and Tricks
Tips for Perfect Caramelization
Achieving that perfect caramelized sugar crust on your crème brûlée can seem like an art, but with these tips, you can master it effortlessly:
- Use Fine Sugar: Fine or superfine sugar melts more evenly and caramelizes better than granulated sugar. It creates a smooth, even crust.
- Chill the Crème Brûlée: Ensure your crème brûlée is thoroughly chilled before caramelizing. This contrast in temperature helps create a crisp, glassy crust.
- Even Layer of Sugar: Distribute the sugar in a thin, even layer. Use a small sieve or your fingers to sprinkle it evenly over the surface.
- Heat Control: Whether you’re using a broiler, stovetop, or heated spoon, controlling the heat is crucial. Too high, and the sugar will burn; too low, and it won’t caramelize properly.
- Quick Action: Once the sugar starts to melt, it can burn quickly. Be prepared to remove the crème brûlée from the heat source promptly.
- Use the Middle Rack: When using the broiler, place the ramekins on the middle rack. This position helps avoid direct heat, reducing the risk of burning the sugar.
Common Mistakes to Avoid
Avoiding common mistakes can save you a lot of frustration and ensure a beautifully caramelized top on your crème brûlée:
- Thick Sugar Layer: A thick layer of sugar can lead to uneven caramelization. Stick to a thin, even layer.
- Insufficient Heating: Make sure your heat source is hot enough to caramelize the sugar. A lukewarm broiler or spoon will not do the job.
- Burning the Sugar: Sugar can go from caramelized to burnt in seconds. Keep a close eye on the sugar, especially when using high heat.
- Uneven Sugar Distribution: Clumps or uneven patches of sugar can lead to spotty caramelization. Spread the sugar as evenly as possible.
Additional Methods and Final Thoughts
Using Other Kitchen Tools
If you’re feeling adventurous, there are other tools you can use to caramelize sugar on your crème brûlée:
- Kitchen Torch: If you have a small culinary torch, it’s an excellent substitute for a blowtorch. It provides the same control and precision.
- Electric Heater: Some kitchens have electric heaters that can be used to caramelize sugar. They require careful handling but can achieve great results.
- Hot Metal Spatula: Similar to the spoon method, a heated metal spatula can be pressed onto the sugar to create a caramelized surface. Ensure it’s extremely hot for best results.
Conclusion
Caramelizing sugar for crème brûlée without a blowtorch is entirely feasible and can even be fun. Whether you choose to use an oven broiler, stovetop, or heated spoon, each method can yield a delicious, crispy crust. By following these detailed instructions, tips, and avoiding common mistakes, you’ll be well on your way to mastering the art of crème brûlée at home.
To start, using the oven broiler method is straightforward and accessible. Preheating the broiler, evenly spreading sugar, and monitoring the caramelization closely can create that perfect golden-brown crust. This method is great for those who prefer a more traditional approach. Alternatively, the stovetop method involves melting sugar in a saucepan and pouring it over the chilled custard, providing a smooth and even caramel layer. This technique offers control over the caramelization process and can be done quickly.
For a more hands-on method, the heated spoon technique allows for precise caramelization. By heating a metal spoon and pressing it onto the sugar, you can achieve a controlled caramelization, creating small, perfect patches of crispy sugar. This method is particularly useful for those who enjoy experimenting with different textures and flavors.
By incorporating these methods, you can elevate your crème brûlée to new heights. Ensure you use fine sugar for even melting, keep the custard well-chilled to create a crisp crust, and always monitor the caramelization process to avoid burning. With practice, you’ll be able to create a dessert that rivals those made with a blowtorch.
So, go ahead and experiment with these techniques, and enjoy the satisfaction of creating a perfect crème brûlée. Dive into the world of caramelization and discover the joy of mastering this classic dessert at home. With each attempt, you’ll gain more confidence and skill, impressing your family and friends with your culinary prowess. Happy cooking!
FAQs
- How do I know when the sugar is properly caramelized?
- Look for a rich golden-brown color. The sugar should be melted and glassy but not burnt.
- Can I use brown sugar instead of white sugar?
- Yes, but brown sugar has a higher moisture content and may not caramelize as evenly as white sugar.
- What is the best type of sugar to use for crème brûlée?
- Superfine or caster sugar is ideal as it melts and caramelizes evenly, creating a smooth crust.
- How can I prevent my sugar from burning?
- Keep a close eye on the sugar as it caramelizes and remove it from the heat source immediately once it reaches the desired color.
With these methods and tips, you can confidently create crème brûlée without a blowtorch, achieving that perfect caramelized sugar crust every time. Happy cooking!