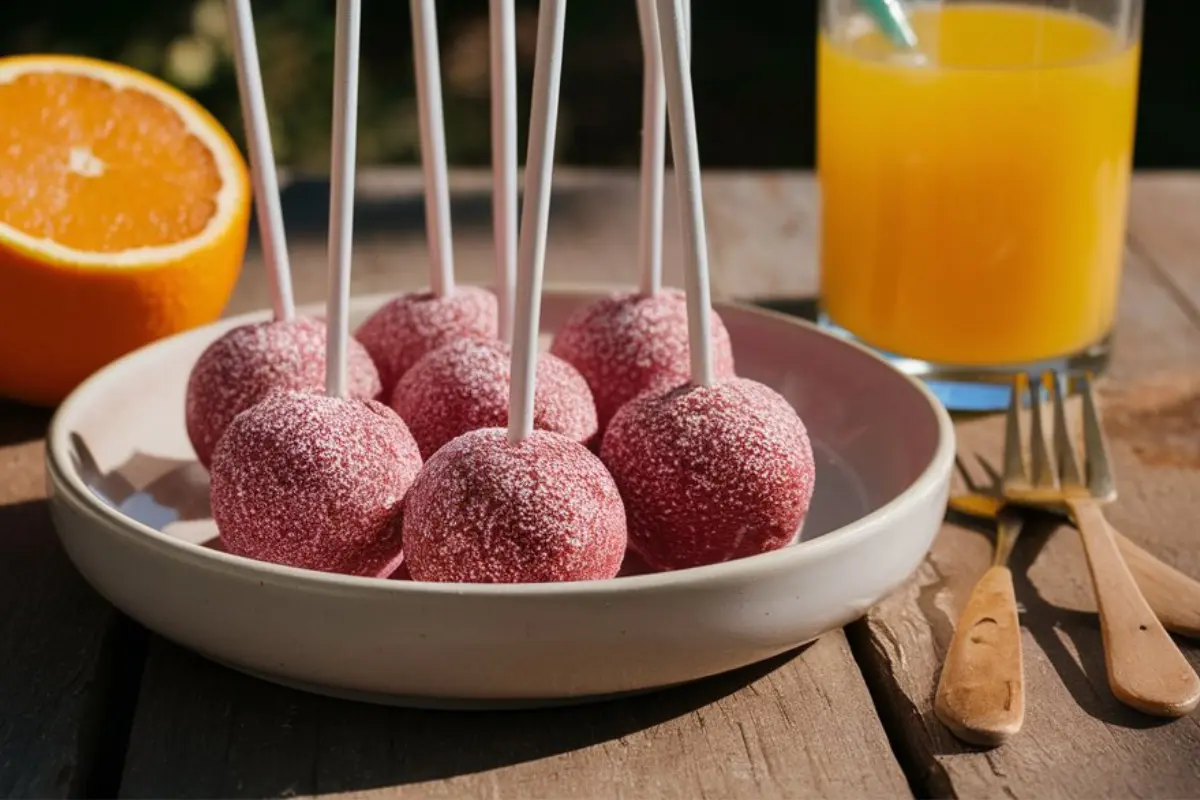
What You’ll Need to Make Starbucks Cake Pops
Ingredients List
To embark on your cake pop journey, you’ll need a few key ingredients. First, a box of vanilla cake mix serves as the foundation. It’s convenient and provides consistent results. You’ll also need vanilla frosting to bind the cake crumbs together. The frosting not only adds flavor but also the necessary moisture. For the iconic outer shell, pink candy melts will do the trick, giving your cake pops that classic Starbucks look. Lastly, don’t forget the lollipop sticks to hold everything together!
Essential Tools
Besides the ingredients, having the right tools can make the process a lot smoother. A large bowl is crucial for mixing your ingredients. You’ll also need a cookie scoop or your hands to form uniform cake balls. A microwave-safe bowl is essential for melting the candy melts, and a baking sheet lined with parchment paper will be needed to set your cake pops before and after dipping. Simple yet effective, these tools help streamline your baking adventure.
Next, we’ll dive into the step-by-step process of making these delightful treats. Stay tuned, because by the end of this, you’ll be a cake pop pro!
Step-by-Step Guide to Making Starbucks Cake Pops
Preparing the Cake Base
First things first, prepare your vanilla cake mix according to the package instructions. Once baked, allow the cake to cool completely; this is crucial as a warm cake will crumble too much when mixed with frosting. Once it’s cooled down, break the cake into small crumbs using either your hands or a fork. The finer the crumbs, the smoother your cake pops will feel when eating.
Creating Cake Balls
Next up, it’s time to mix these crumbs with vanilla frosting. Start by adding a small amount of frosting and mix thoroughly. You’re aiming for a texture that holds together well but isn’t too moist; otherwise, the balls will not hold their shape. Once mixed, use a cookie scoop to scoop out uniform balls of the cake mixture. Roll these scoops in your hands to form smooth, even balls. Place these on a parchment-lined baking sheet and chill in the fridge for at least two hours, or in the freezer for about 30 minutes if you’re short on time.
Decorating Your Cake Pops
Once your cake balls are firm and chilled, melt the pink candy melts in a microwave-safe bowl, stirring until smooth. Before inserting the lollipop stick into a cake ball, dip its tip into the melted candy to ensure the cake ball stays securely on the stick. Then, dip the entire cake pop into the melted candy, ensuring it’s completely coated. Tap off any excess coating to avoid drips. Before the coating sets, sprinkle with white sugar pearls for that signature Starbucks finish. Allow them to dry by sticking the pops into a styrofoam block or a cake pop stand.
With your cake pops beautifully decorated, you’re almost ready to enjoy these tasty treats. But before that, let’s look into some professional tips to perfect your cake pop making skills.
Pro Tips for Perfect Cake Pops
Creating Starbucks cake pops that look and taste wonderful doesn’t have to be daunting. Here are some expert tips to help you achieve perfection every time:
Ensure Even Sizes:
Consistency is key! Using a cookie scoop helps ensure that all your cake balls are uniform in size, which not only makes them more appealing but also ensures they all chill and set at the same rate.
Chill Thoroughly:
Don’t rush the chilling process. Cake balls need to be firm enough to hold on to the lollipop stick without falling apart. If they’re too soft, they might not survive the dipping process.
Smooth Dipping:
To achieve a smooth, professional look with your candy coating, ensure that your candy melts melt completely without any lumps. You may want to add a touch of coconut oil or vegetable shortening to thin out the coating if it becomes too thick.
Decorate Quickly:
After dipping the cake pops in the candy melts, add any decorations like sprinkles or sugar pearls quickly before the coating sets. This ensures they stick well and are evenly distributed. For an in-depth look at professional techniques and creative ideas in cake decoration, consider exploring The Art of Cake Decorating from the Institute of Culinary Education
Fix Mistakes Fast:
If a cake pop falls off the stick or cracks, you can often repair it by re-dipping it in the melted candy. The fresh coating will act as glue, helping to hold everything together.
Let Them Set:
Once decorated, inserting the cake pops into a styrofoam block or a cake pop stand to let them set completely avoids any smudges or flat sides that might occur if laid down on a surface.
With these tips in hand, your cake pops will not only taste great but also look professionally made. Next, let’s explore how to add your personal touch to these treats with some fun and creative customization ideas.

Customizing Your Starbucks Cake Pops
Flavor Variations
Who says you need to stick to vanilla? Feel free to let your creativity shine by experimenting with different cake and frosting flavors. Chocolate, red velvet, or even lemon cake mixes can provide a delightful twist to your cake pops. Pair them with complementary frostings—think cream cheese for red velvet or a tangy lemon buttercream to enhance a lemon cake base.
Decorative Ideas
The real fun begins with decoration! Aside from the classic pink candy melts, why not try other colors to match a theme or occasion? Blue and white for a baby shower, red and green for Christmas, or even multicolored sprinkles for a birthday party. Each event can have its unique spin on the traditional Starbucks cake pop.
For an extra special touch, consider molding your cake pops into different shapes before chilling. Hearts for Valentine’s Day, stars for a Fourth of July bash, or even letters to spell out names or messages for a personalized touch. Just remember, the more intricate the shape, the more careful you’ll need to be during the dipping process.
These customizable elements allow you to not only replicate the beloved Starbucks style but also to make each batch of cake pops uniquely yours. Expressing your creativity can make the baking process even more enjoyable and the final product even more satisfying. Next up, we’ll cover some essential tips on storing and preparing your cake pops in advance, ensuring they’re as fresh and delicious as possible for any occasion.
How to Store and Prepare in Advance
Making Starbucks cake pops ahead of time can be a game-changer, especially for busy schedules or preparing for an event. Here’s how to ensure they stay fresh and tasty:
Storing Cake Pops:
After your cake pops have fully set and the candy coating has hardened, you can store them at room temperature for up to a week. Keep them stored in an airtight container to preserve their freshness. If you need to keep them for longer, refrigerating them can extend their life up to two weeks. Just make sure to wrap them individually in plastic wrap or place them in a tightly sealed container to prevent moisture from making them soggy.
Freezing for Long-Term Storage:
For even longer storage, cake pops can be frozen for up to a month. To freeze, place the fully assembled and dried cake pops on a baking sheet to flash freeze. Once they have become solid, move them into a freezer-safe bag or container. When you’re ready to indulge, just thaw them in the refrigerator overnight. This method helps preserve their texture and taste.
Prepping in Advance:
If you’re planning to serve your cake pops at a party or gathering, you can prepare them a day or two in advance. Assemble and decorate the cake pops as usual, then store them in a cool, dry place until you’re ready to display them. This can help you avoid last-minute stress and give you more time to focus on other preparations for your event.
By learning how to store and prepare your cake pops in advance, you’ll guarantee that they remain as delightful to eat as they were on the day you made them. Whether you’re making them for a special occasion or just as a treat, these storage tips will help keep your cake pops looking and tasting their best. Next, we’ll answer some frequently asked questions to help clear up any uncertainties you might have about making cake pops.
Conclusion
In conclusion, mastering the art of making Starbucks cake pops at home is a rewarding endeavor that combines creativity with culinary skills. By following the detailed steps provided in this guide, you can create treats that not only mimic the iconic flavors but also showcase your personal touch. From choosing the right ingredients and tools to expertly decorating and properly storing your cake pops, each element plays a crucial role in ensuring success. Remember, the key to perfect cake pops lies in patience and practice. So, whether you’re preparing for a special occasion or simply indulging in a baking project, these tips and tricks will help you achieve beautiful, tasty results every time. Enjoy the process and the delicious outcomes—happy baking!
Frequently Asked Questions
What are Starbucks cake pops made of?
Starbucks creates cake pops by blending a crumbled cake base with frosting to form pliable balls. They then immerse these delightful treats in a candy coating and adorn them with sprinkles or other toppings, enhancing both texture and visual allure.
How many cake pops does 1 box of cake mix make?
A standard box of cake mix can typically yield about 20 to 30 cake pops, depending on the size you roll your cake balls. Using a small cookie scoop to measure can help ensure each cake pop is uniformly sized.
How much does a cake pop cost at Starbucks?
The price of a cake pop at Starbucks can vary by location but generally ranges from $1.95 to $3.50 each. Pricing may differ based on the flavor and any seasonal offerings.
Do Starbucks cake pops need to be refrigerated?
It is not necessary to refrigerate Starbucks cake pops unless you want to extend their freshness. At room temperature, they can last for a few days when stored in an airtight container. For longer storage, refrigerating them can help preserve their quality for up to two weeks.
These answers should help clarify some common queries regarding Starbucks cake pops, whether you’re looking to replicate them at home or just curious about their details.


